Party/Drinking Game
Introduction and Results
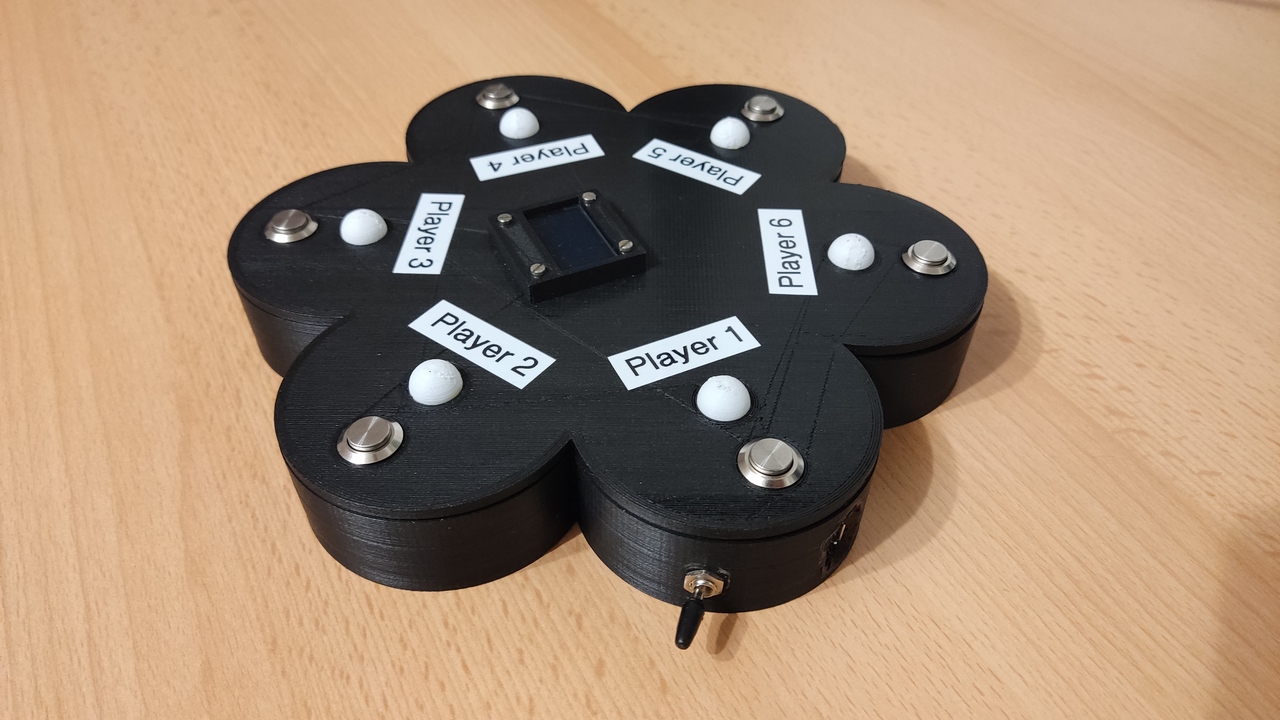
Every now and then there are occasions when people gather e.g. on a party or for a weekend on a hut. To keep the entertainment level high, there is a huge variety of dice/card/cup/block/.. games available. Sometimes also modified versions of children games are used.My goal was to design and build a base hardware that allows the implementation of different games for such events. Here are the results:
Requirements and Games
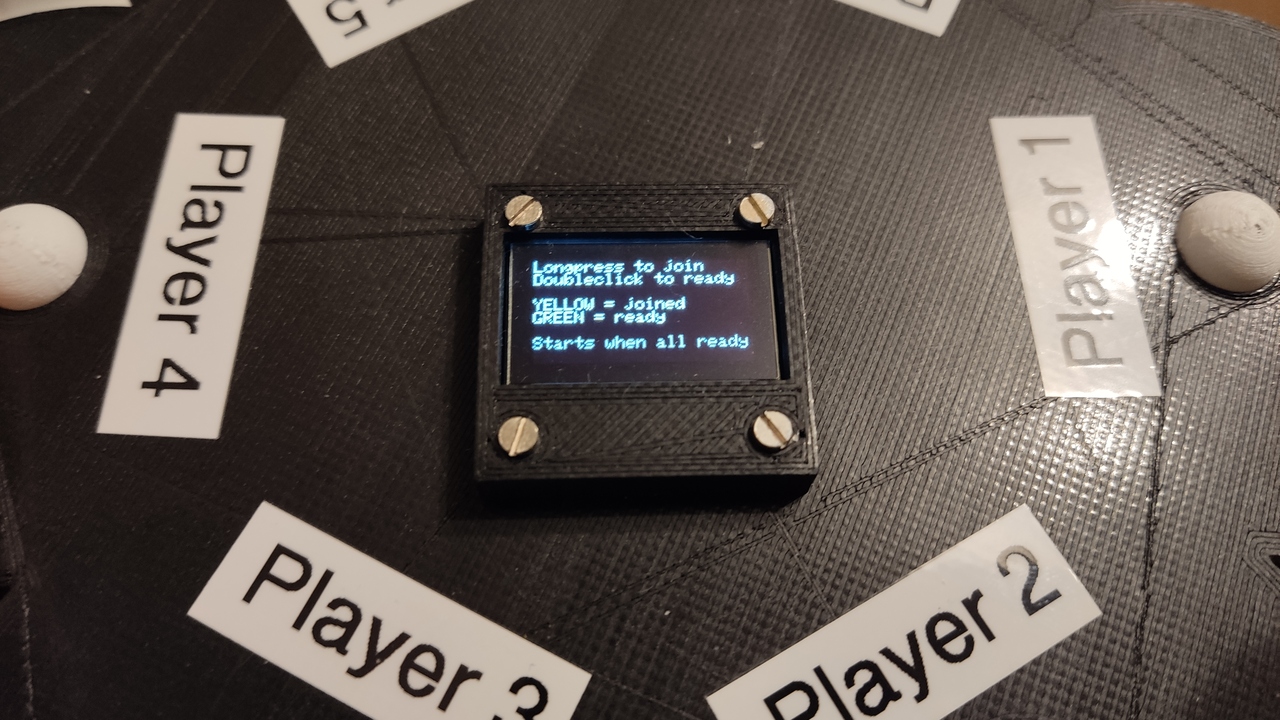
To interact with the game, every player gets some space to put his hand, a button, a RGB LED and the instructions on a (common) OLED display.The hardware should be transportable and usable without any external power source.
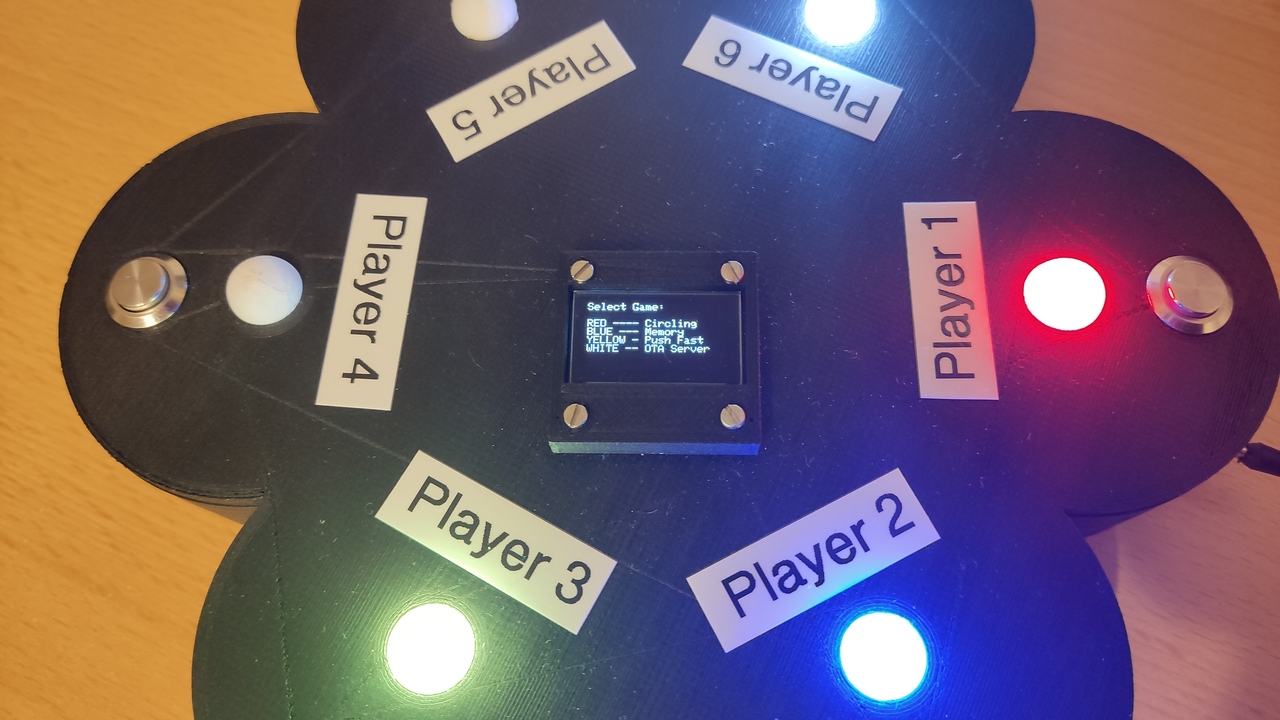
The initial implemented games are:
Push Fast
All LEDs are pulsating for some (random) time. As soon as they turn off, each player must push his/her button as fast as possible. Last player looses. Pushing too early looses as well.Memory
LEDs light up in a random sequence. The current player must correctly remember and repeat it using the buttons. Sequence length and speed increases over time.Circling
One LED lights up, this player starts. Single click passes the turn to the next player, a double click passes it to the previous player. Allowed reaction time reduces over time.
Shopping List
- 12mm Steel Push Buttons
- WS2812B RGB LEDs
- 0.96" OLED Display I2C
- ESP32 Dev Board
- 3.7V 18650 Batteries
- TP4056 charger module with protection
- Step Up Converter 3.7V to 5V
- Battery Spring Contacts
- Toggle Switch
Housing
The housing is designed using openscad: partygame-openscad.zip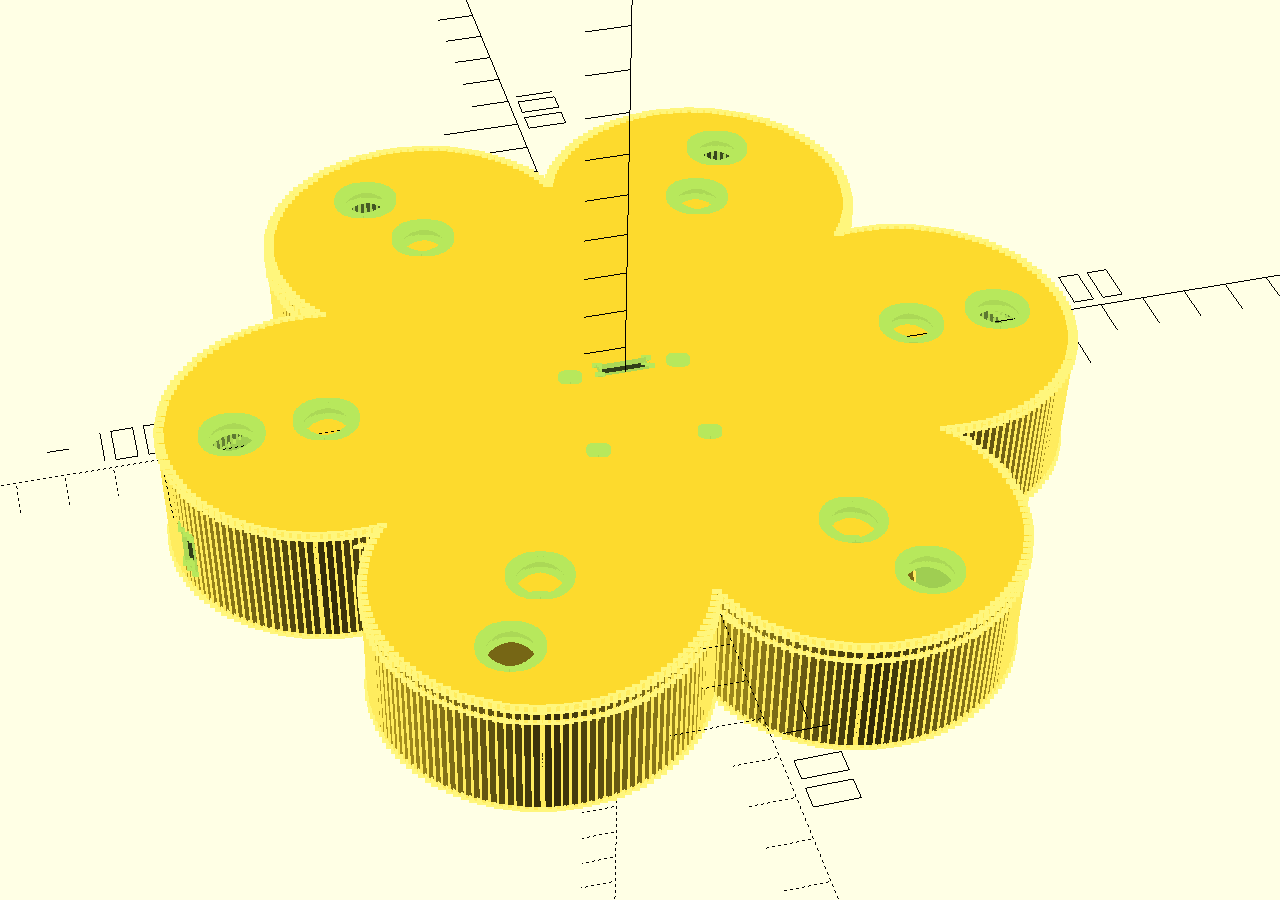
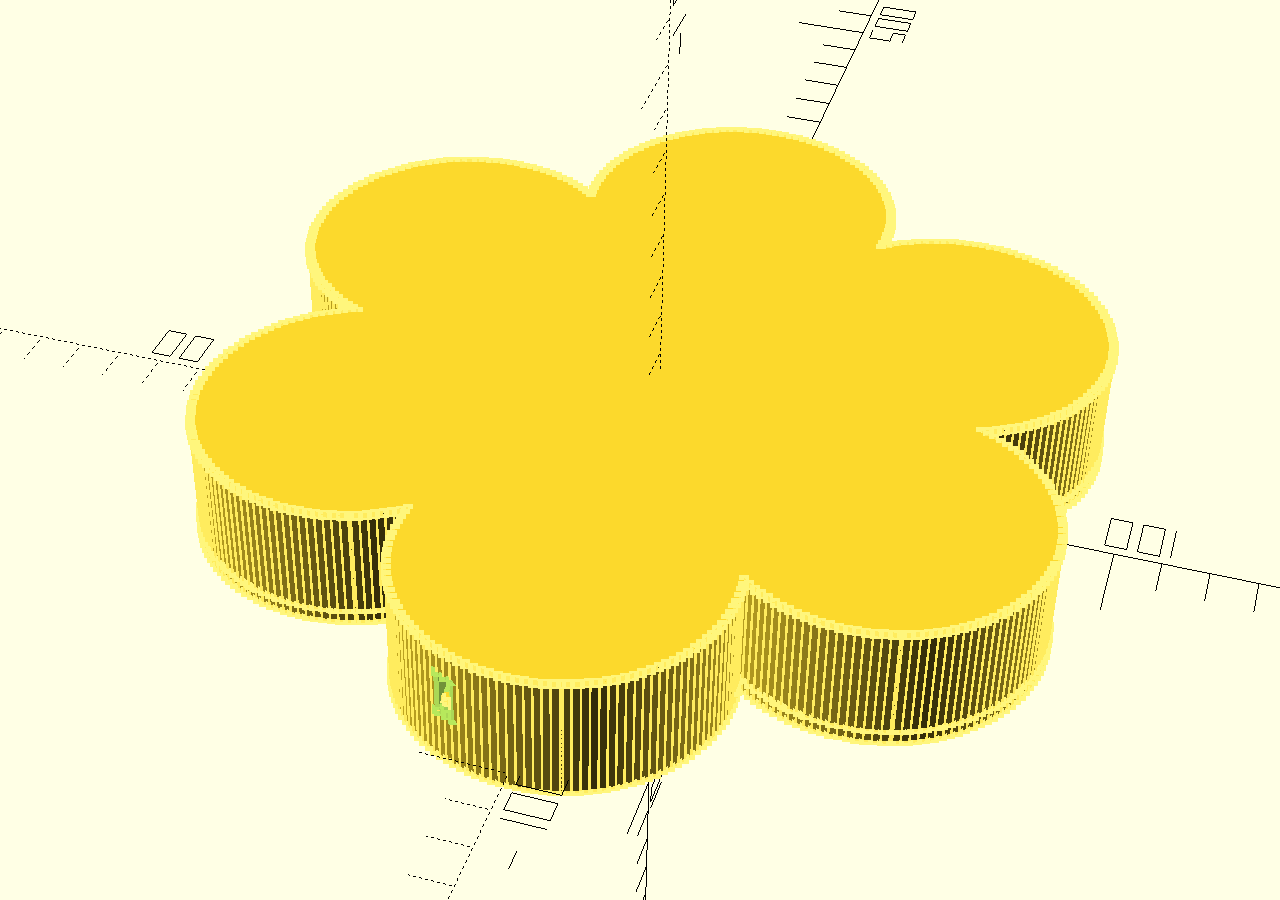
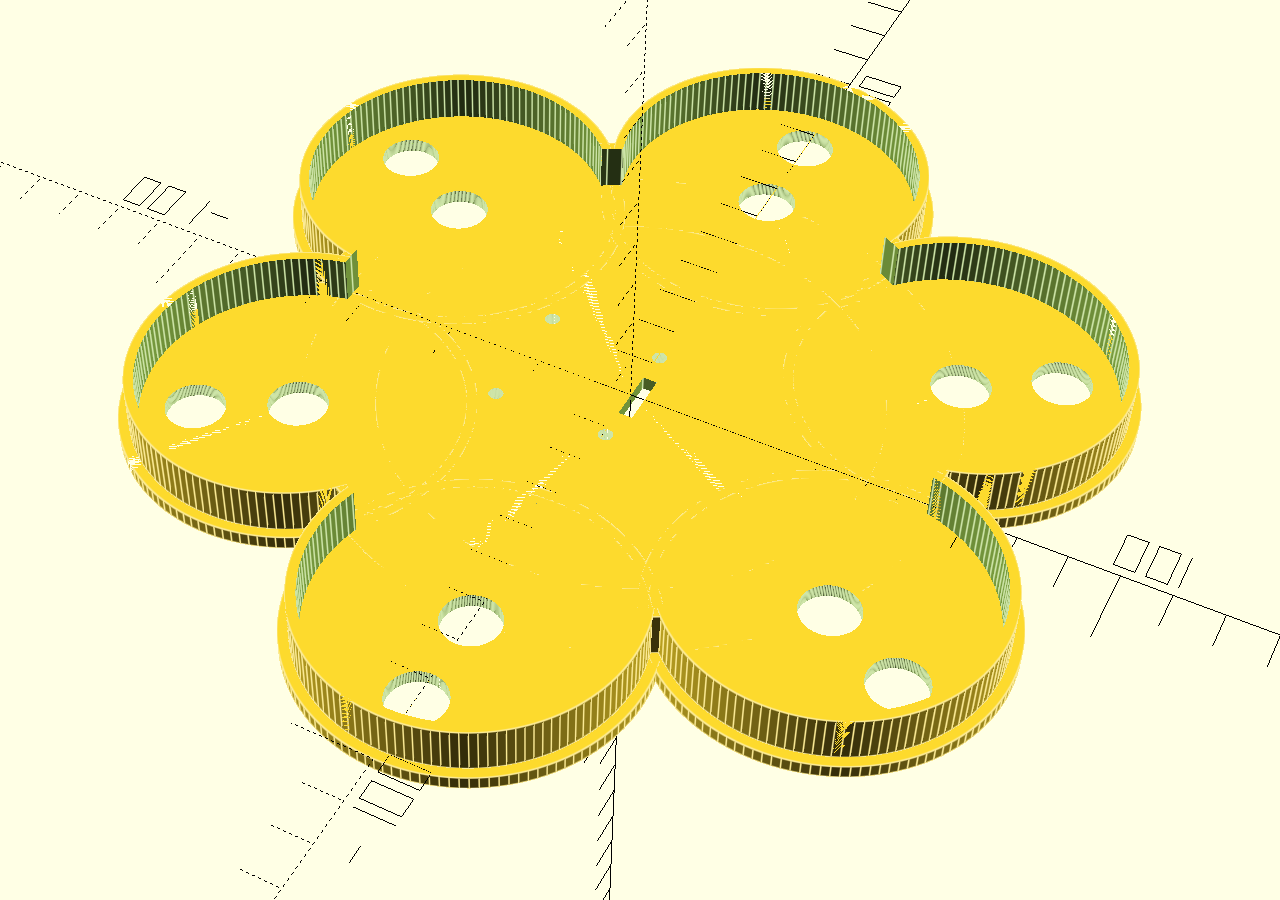
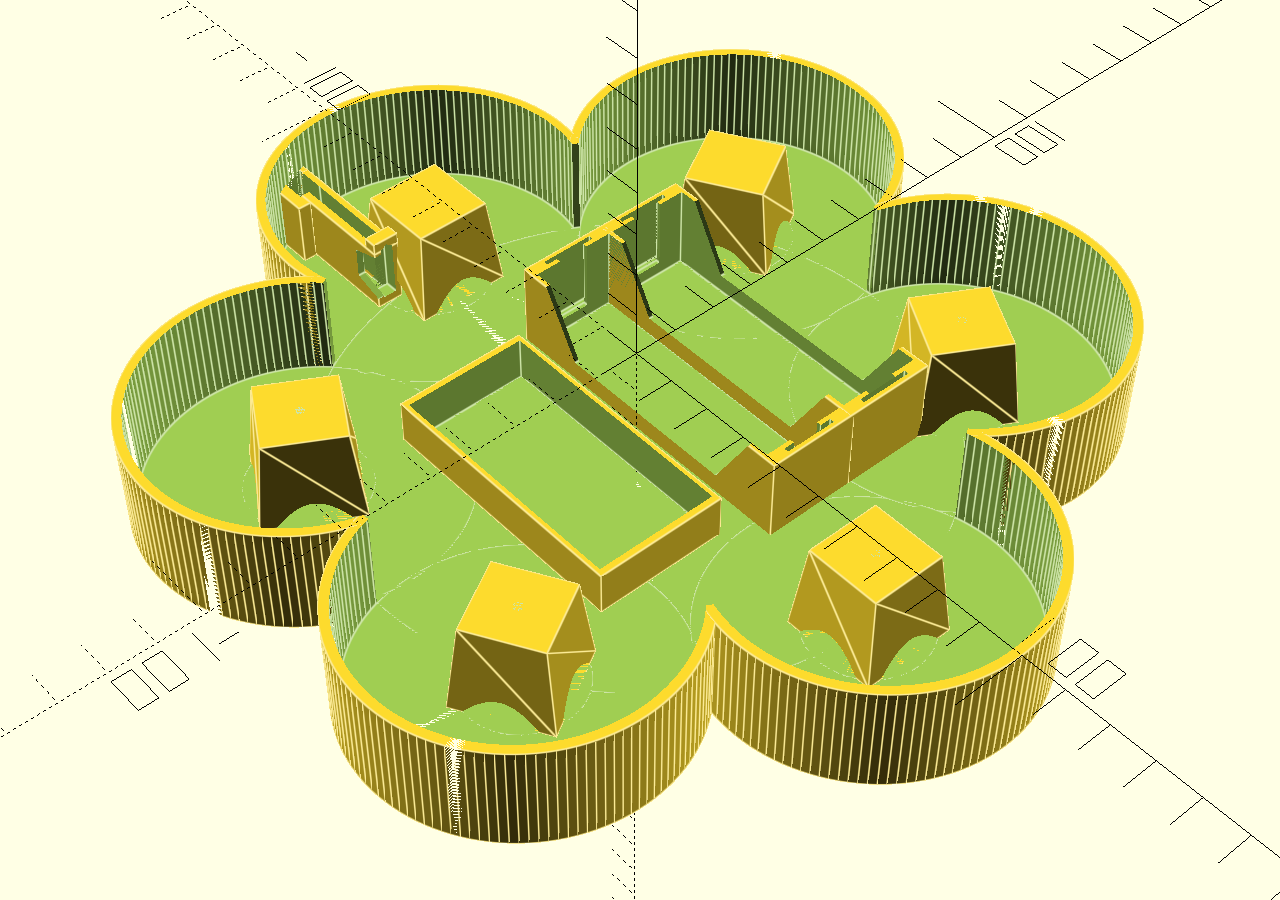

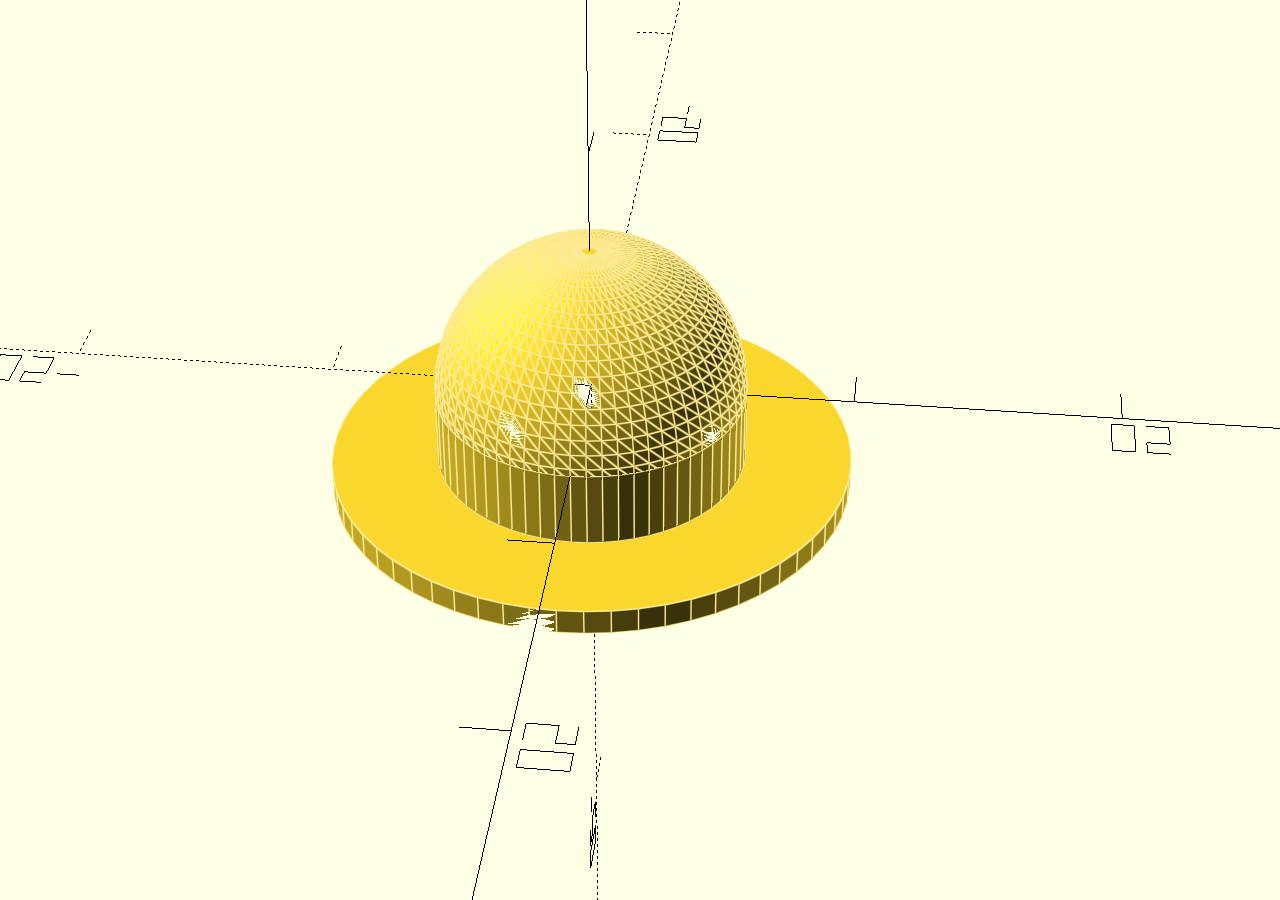
I have printed all parts in PLA (diffusors in white). Unfortunately the micro-usb connector didn't fit, so I had to manually modify it with the soldering iron.
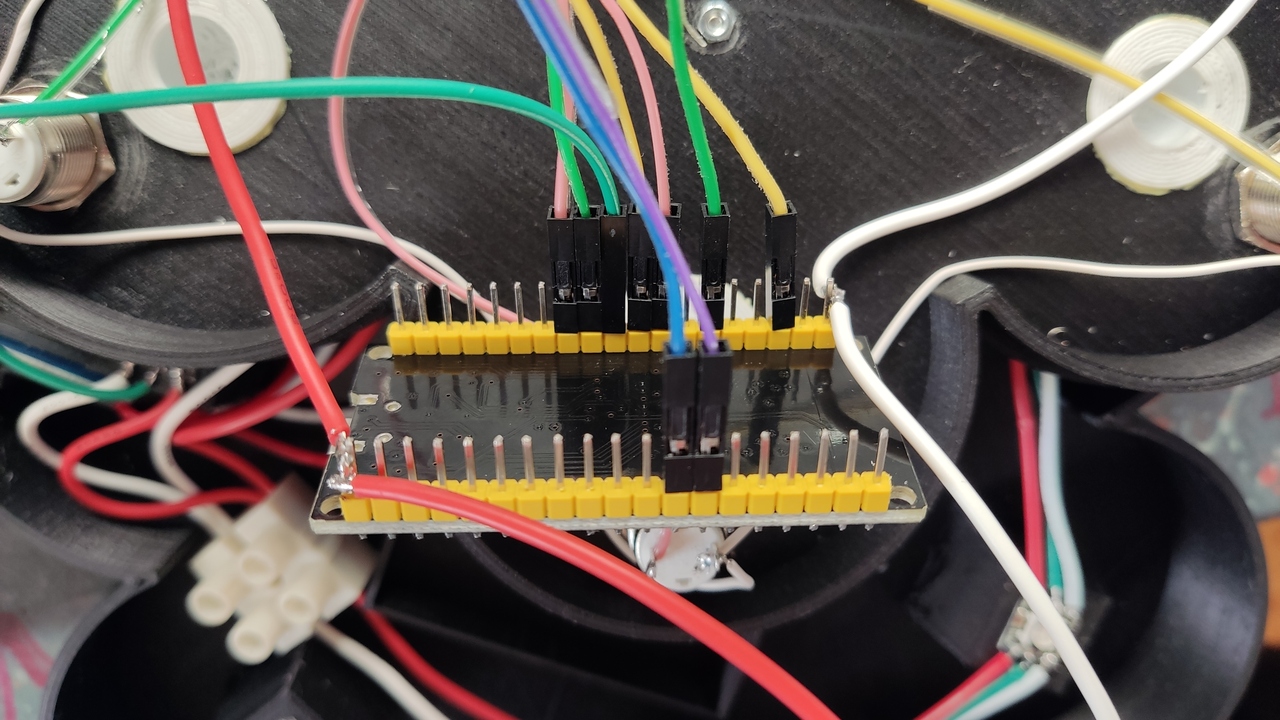
Wiring
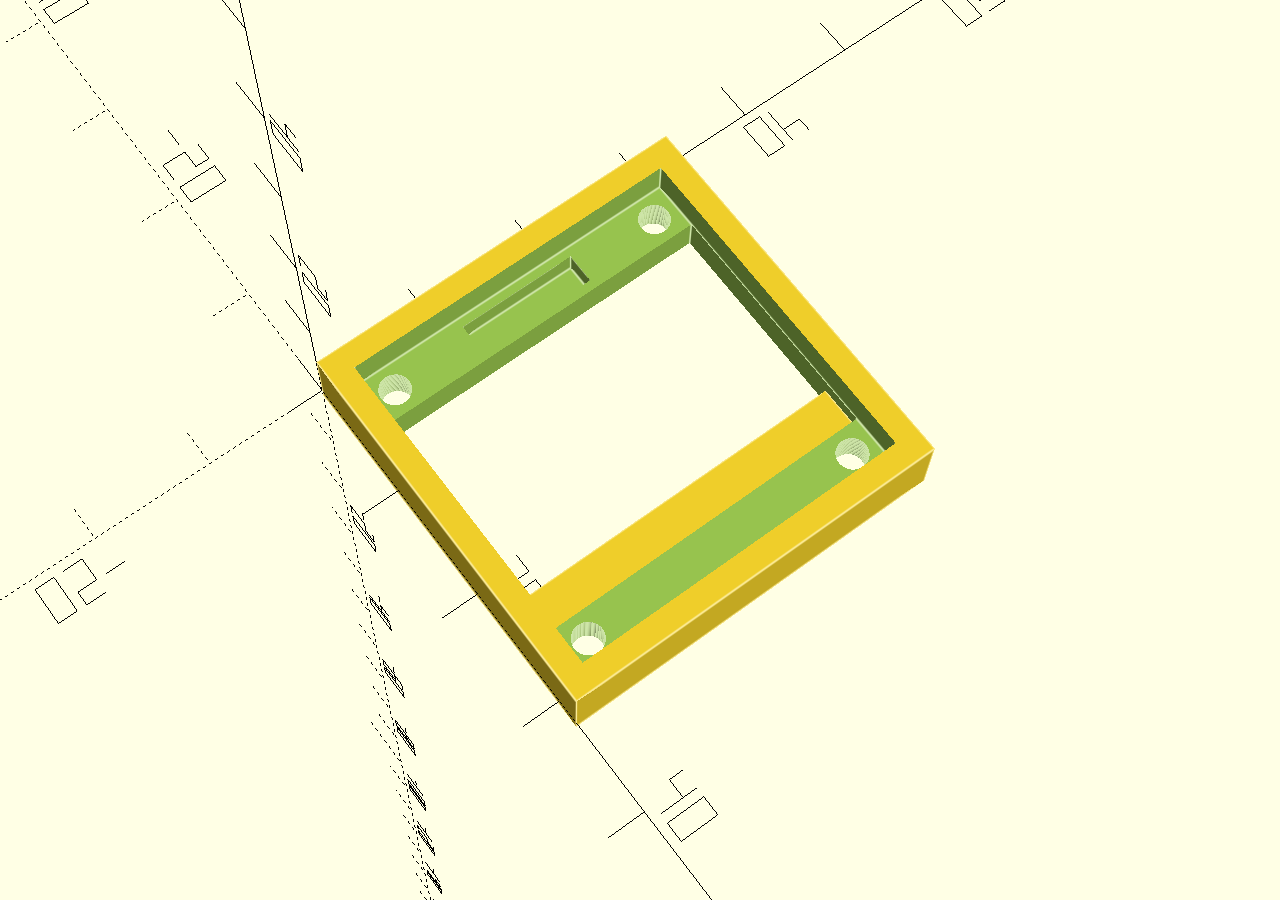
After buying/printing all the parts, the fun begins!Attach the OLED display with the frame onto the top using four screws. Remember the PIN layout of the display!
Glue the LEDs onto their pedestals and connect them in a circle. Check the direction and leave one part open!
Connect one PIN of each push button to GND. This can be done in a circle and then connecting it to GND of the display.
Connect the battery outputs of the TP4056 to the spring connectors for the battery. (I've designed it for two batteries in parallel, but one is enough!)
Adjust the Step up converter board to produce 5V output voltage. Check your datasheet for it!
Connect the consumer output of the TP4056 via the power toggle switch to the step up converter board.
Connect the step up 5V output (+/-) to the LEDs, the OLED display and the ESP32 board.
Connect the free PINs of the push buttons to the GPIOs of the ESP32.
Connect the I2C data PINs of the OLED display to the GPIOs of the ESP32.
Make sure you can still reach the micro-usb port of the ESP32 to flash the first firmware. Later we can use OTA (over-the-air) updates for it.
...done!


Note: The battery should not be charged while the game is in use, as it could result in an overcharge of the battery. For more information and how to improve it, see here.
Software
A couple of libraries are used:- FastLED for the WS2812B LEDs.
- MultiButton for click detection.
- Adafruit SSD1306 and Adafruit GFX Library for the OLED display.
- ElegantOTA for OTA updates.
LEDs, Buttons and Display are abstracted away and injected as dependencies to the business/game logic. Check the corresponding headers for PIN layouts, etc!
On start-up some small checks are done and then a selection menu is shown. Based on this, one Game instance is created, initialized and then executed in a loop. This way it is easy to add new games.. :)
PS: The OtaServer is also implemented as a game. Ensure you set it up correctly, then you hopefully never need to open the housing anymore!
The version from 2022-12-10 can be found here: partygame-code.zip