Just another wordclock, swabian version
Introduction and Results
Some years ago my mum got a swabian version of a word clock made by a friend. It has the hidden feature to switch to "S'ISCH ROSI'S UHR" ("IT'S ROSI'S CLOCK"). I decided to copy the clock as a gift for my cousins wedding and add the names of the bride and the groom. On the left, you can see the original template and on the other two pictures there's my copy.


Links to other Wordclocks
There are a lot of tutorials for building such a clock in the internet, for example:- http://www.instructables.com/id/My-Arduino-WordClock/
- http://www.highonsolder.com/blog/2011/1/8/arduino-word-clock.html
- http://www.instructables.com/id/Sleek-word-clock/
Designing the Mask
First thing to decide is the language of the clock and what features the mask should contain. My chosen language was swabian with the names of the bridal couple as additional text. At the beginning I thought about using a genetic algorithm to find a suitable mask, as described here, but then I went the easy way and created it on my own.A frame is needed to estimate the size, for example: Ikea Ribba Frame [large one, black]. Next, the letter size and spacing is defined. For me it is 20mm height, 15mm width, 15mm horizontal spacing, 12.5mm vertical spacing per letter.


Choosing the Color
While my template had red LEDs, the color of my choice was orange. I bought about 100 pieces at amazon. In the meantime I would look for wide-angle LEDs, but it's not really a problem. It can be fixed in half an hour.Practical Skills - Drawing and Drilling
As soon as the previous steps are done, the position of the LEDs on the back of the frame can be calculated and the holes for the LEDs can be drilled. I used a 4.5mm drill for 5mm LEDs.


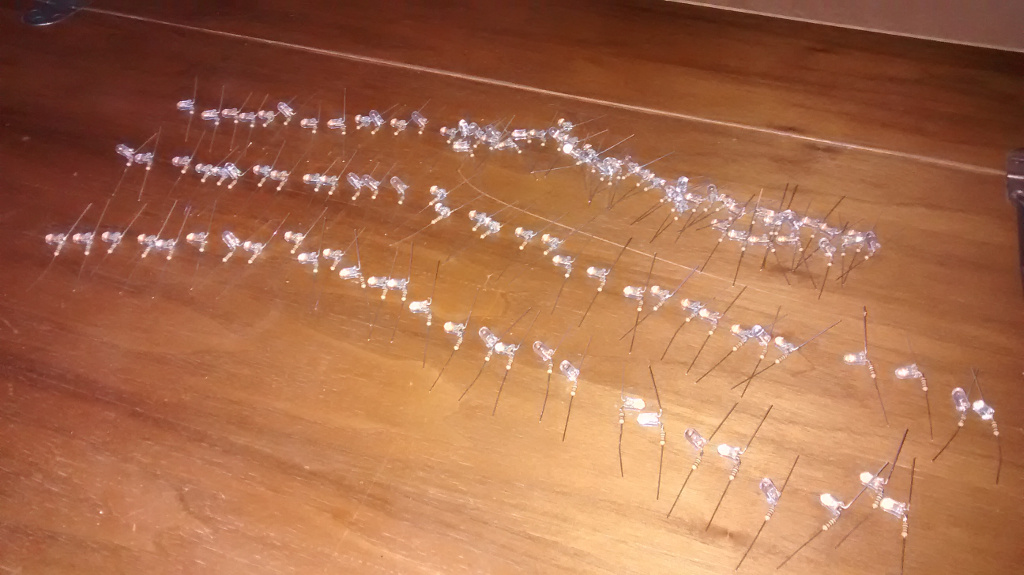
Practical Skills - Soldering LEDs
Each LED needs a resistor and this can be soldered directly to one of the pins (always the same, either anode or cathode!). Afterwards, the prepared LEDs can be put into the drilled holes on the back of the frame. Then one pin of each LED is connected for the whole row and the other one just for the letters of the word. Doing this for all rows and soldering the connected rows results in a grid-like pattern.